Billings & Payments
Therapy House's preferred payment platform is Stripe. Stripe allows the clinic to store clients' cards on file and take a payment at any time.

Adding a Card on File
Therapy House's preferred payment platform is Stripe. Stripe allows the clinic to store clients' cards on file and take a payment at any time.
- To add a card on file, you can either:
- Click on the client's appointment and go to the right where the appointment information is displayed.
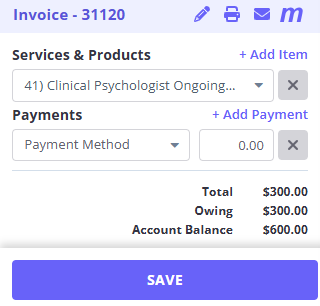
- Underneath Invoice, Services & Products is Payments.
- Click on Payment Method and choose Credit Card – Stripe.
- Add the card details here and ensure Securely store card details? is ticked.
- Proceed with payment.
- NOTE: following this process ensures that the appropriate Stripe Account (Business Default or Consultant) is automatically applied.
- Click on the client's appointment and go to the right where the appointment information is displayed.
OR
- In the client's profile, click on Billing→Billing Setup
- If the client is a child, ensure the Bill To: has been set up to bill to the parent. Follow the below steps within the parent's client profile.
- To access the parent's profile, click on Profile→Contacts →Parent →View Contact's Full Profile →Billing →Billing Setup
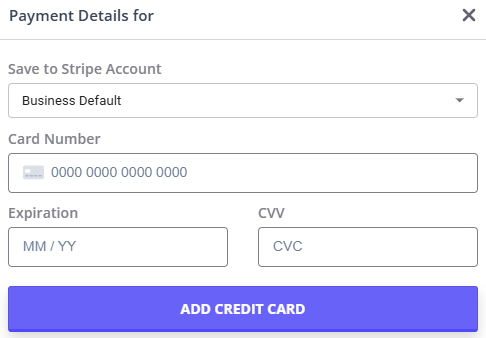
- Once in Billing Setup, click Saved Card Details →Add Card
- If the client is seeing a Therapy House Employee, ensure that the Stripe Account is set to Business Default. If the client is seeing a consultant, ensure that the Stripe Account is changed to the relevant consultant.
- If the client is a child, ensure the Bill To: has been set up to bill to the parent. Follow the below steps within the parent's client profile.
Processing Payments
To process a payment:
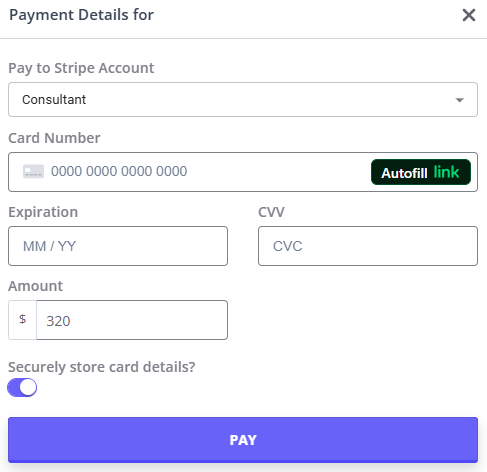
- Click on the appointment to open the right side panel, and under Invoice →Payments click on Payment Method →Credit Card - Stripe.
- Once the card details appear, double check the payment amount and select Pay.
- When the payment has processed, always send through a receipt by clicking the mail icon ✉ and scrolling to the bottom of the pop up to click Send Email.
- Stripe will send an email receipt of the payment to the admin email. If the clinician is a consultant, the receipt will be sent directly to them.
- If the client is seeing a Psychologist under a Mental Health Care Plan, their payment must be lodged to Medicare.
- Click on M at the top right corner of the INVOICE section of the appointment booking.
- Click on Create Patient Claim. Ensure all the details already entered are updated and accurate.
- Child clients must have have parent listed in Consent Form as claimant selected.
- Scroll to the bottom of the page and click Send.
- Scroll back to the top of the page and click the green Email button to email the client the Medicare lodgement receipt.
- Go to Client Details →Admin Notes and write the date the claim was submitted in their MHCP session notes.
NDIS Billings
- If the client is a Plan Managed NDIS client, send the invoice through to their Plan Manager.
- For Plan Managed NDIS invoice, click on the pencil icon to Edit the invoice.
- Change the Quantity to 1.2 and click Save Invoice.
- Email the invoice to the Plan Manager.
- If the client is a Self-Managed NDIS client, they should have their card stored on file and we can take their payment as normal.
- Click on the pencil icon to Edit the invoice and change the fee to match the private billing fee for the clinician.
Note: if you are ever unsure how/what to charge a client, check their past invoice and see how they have previously paid. If they paid by Stripe, it will say Credit Card (online) and if they had their invoice sent through to them it will either say Invoice emailed to Plan Manager or Invoice emailed in the comments box.
Adding Payments
If we have received a payment via Square, it must be added to Zanda to allocate the funds. Typically, this is only done when sending out an assessment invoice.
Square will email us when an invoice has been paid. Once this email has been received, open Zanda and click on the relevant client's profile.
In Zanda:
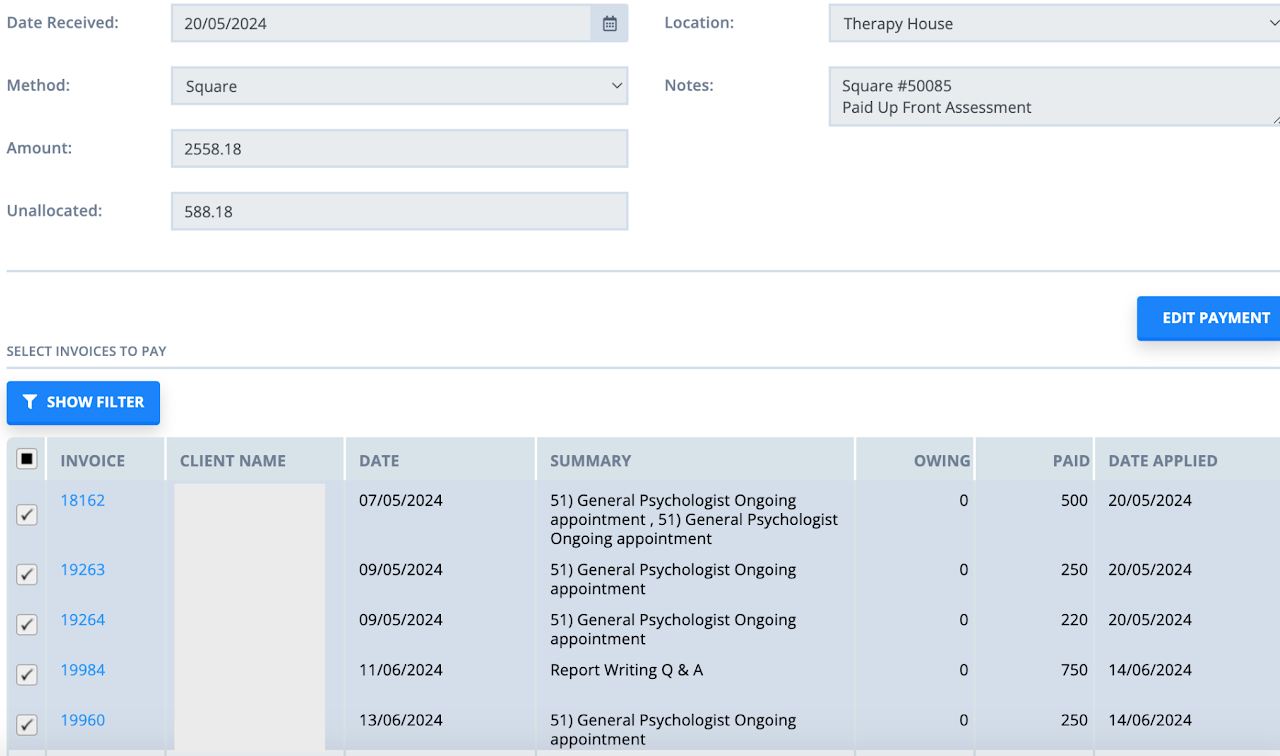
- In the Client Profile, go to Billings → Payments.
- Add the date the payment was received.
- Click New Payment and input the total into Amount.
- Under Notes, add the Square Invoice Number and the items on the invoice.
- Once inputted, select existing invoices related to the payment and allocate the funds.
- For example, if the client paid up front for an assessment through Square, allocate the money to the assessment/report writing/feedback session invoices.